This chapter is aimed at advanced users who want to configure Geoconcept Web specifically for their own use, either because some of the components are already installed on the target server, or because they have a particular architecture that requires special treatment.
The Geoconcept Web installer installs and configures version 8 of Tomcat. You can, nonetheless, use a Tomcat that is already present on the server, or install it separately from the Geoconcept Web installer.
We recommend using version 8 of the Apache Tomcat server. You can download this version from the following site: http://tomcat.apache.org/.
Next, run the installer and follow the various steps described. The installation directory is not critical, but it will be necessary to keep the location recorded somewhere for the next part of the installation of the application. It will be called <TOMCAT_HOME> in the remainder of this document.
The installer requests an administration password (optional). If you would like to use a password, choose one you can remember, and store it carefully somewhere. Associate the value 80 for the port used by the Apache Tomcat service (if this port is already used, choose another one).
![[Warning]](images/community/docbook/warning.png) |
Warning |
|---|---|
|
Take care when using several Apache Tomcats on the server: it will be necessary to check, and if need be modify, in the
|
Next, it will ask if you wish to install the software as a service. Reply in the affirmative to this question.
At the end of the installation the Tomcat service has been installed.
If Tomcat is already installed, it will be necessary to modify the server.xml file.
In <GlobalNamingResources> add:
        <!--GC-->
        <Resource
        name="geoconcept/gc/default"
        type="com.geoconcept.gc.provider.Provider"
        scope="Shareable"
        description="GC connection factory -local dll"
        auth="Container"
        RootDirectory="C:\Program Files\GEOCONCEPT\Geoconcept Web\gc\jee\gc"
        factory="com.geoconcept.gc.connect.tomcat.ConnectionFactory"
        ConnectionMode="LocalDll"
        />

        <!--UGC-->
        <Resource
                name="geoconcept/ugc/default"
                type="com.geoconcept.ugc.service.CodingProvider"
                scope="Shareable"
                description="UGC connection factory -local dll"
                auth="Container"
                RootDirectory="C:\Program Files\GEOCONCEPT\Geoconcept Web\ugc\jee\ugc"
                RefTablesDirectory="C:\Geoconcept Web\data\maps"
                factory="com.geoconcept.ugc.connect.tomcat.ConnectionFactory"
                ConnectionMode="LocalDll"
        />

        <!--SmartRouting-->
        <Resource
                name="geoconcept/smartrouting/default"
                type="com.geoconcept.smartrouting.Provider"
                scope="Shareable"
                description="Smartrouting connection factory -local dll"
                auth="Container"
                RootDirectory="C:\Program Files\GEOCONCEPT\Geoconcept Web\smartrouting\jee\smartrouting"
                GraphsDirectory="C:\Geoconcept Web\data\maps"
                factory="com.geoconcept.smartrouting.connect.tomcat.ConnectionFactory"
                ConnectionMode="LocalDll"
        />
Go with the Windows file explorer into the <TOMCAT_HOME>/bin directory and run the «Tomcat8w.exe» executable (in the presence of version 8 of Apache Tomcat). This executable is the console of the Apache Tomcat application server.
The Start button is greyed out when the server is actually executing. In this case, click on the Stop button to stop it.
Position the Startup type option on Automatic, and click on the button. Next, go into the Java tab, and in the 'Java options' box add the lines:
-Xmx1024m
-Xms256m
- and click on the button.
Return to the General tab and click on to start the Tomcat server.
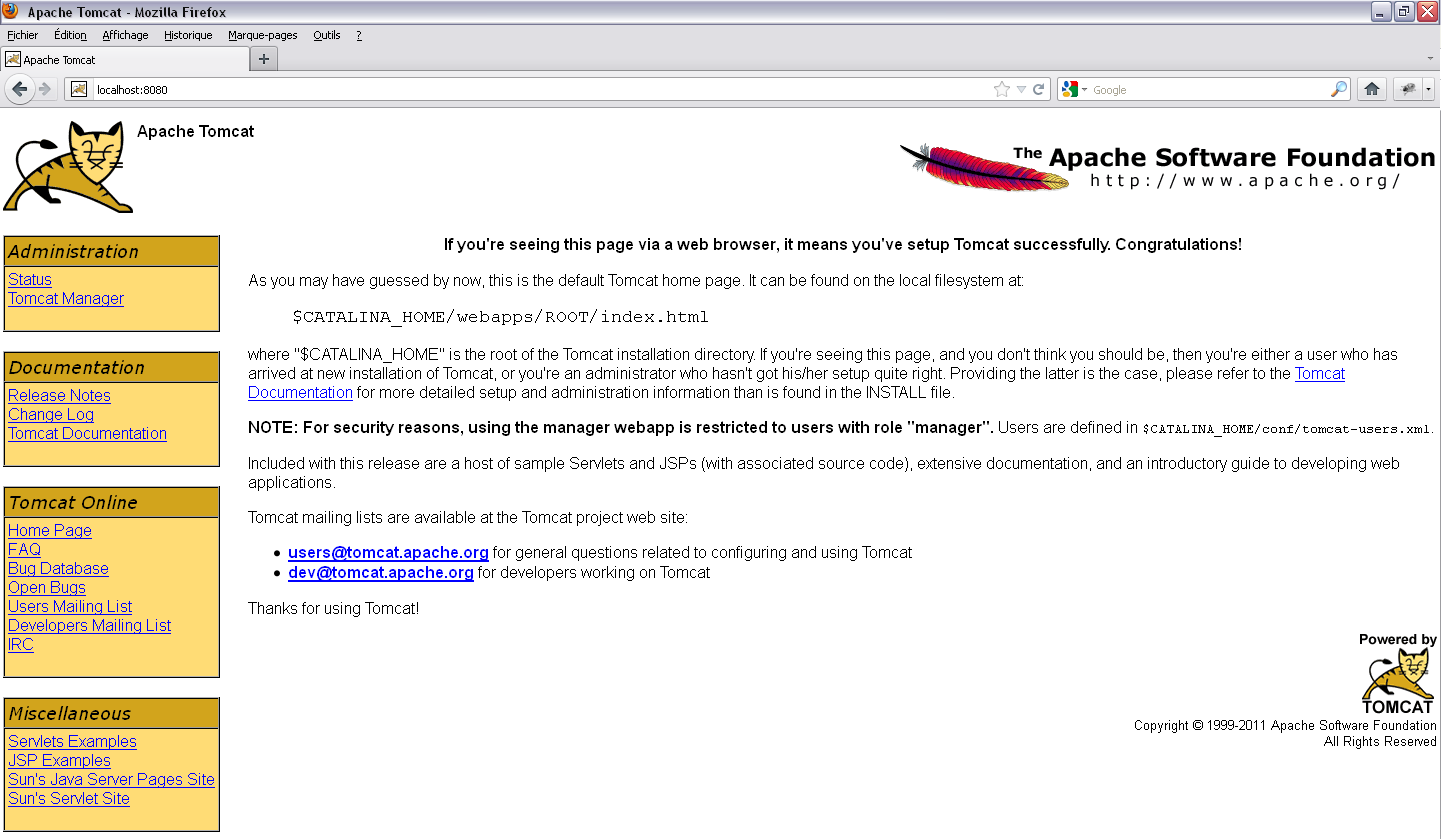
In order to verify whether the installation has been correctly performed, open a web browser and type in the following URL: http://localhost:numero_port_utilise (for example: http://localhost:80 or http://localhost).
You should obtain the equivalent Tomcat home page.
In order to function, a database has to be accessible to the web application so the latter can store its parameters there. You will be able to use a database that is already deployed within your work environment (locally or on the network). If no database is available, it will be necessary to install one.
Standard databases can be used in the context of an installation of our solution. We will describe the utilisation of the MySQL, PostgreSQL, SQL Server and Oracle databases in detail. Utilisations of other databases are described briefly: the procedure remains identical in each case (creation of a schema and of a user having all the rights associated to this schema, addition of the JDBC driver) with the characteristics specific to each database.
Note that an embedded database system (HSQLDB) is also described. With this system, installing a DBMS locally will not be necessary. The data will be stored in files created on the disk.
![[Tip]](images/community/docbook/tip.png) |
Tip |
|---|---|
|
The HSQLDB system can be used if no advanced database management is required, for example, where a deployment is set up exclusively for the purpose of using Geoconcept Web web services. We strongly advise against using HSQLDB to create portals from the solution’s Designer tab. |
Installing the database
Version 8.0 is the current version of MySQL. It can be downloaded at the following address: https://dev.mysql.com/downloads/mysql/ .
In the list of downloadable products, select and download the Windows MSI Installer file appropriate for your computer (32-bit or 64-bit): this file is of the mysql-n°de-version-win32.msi type. Once downloaded, double-click on the downloaded file to run the installation and then follow the instructions that guide you through the various steps of the installation.
At the end of the guided procedure in the wizard, check the «Launch the MySQL Instance Configuration Wizard» check-box and then assign values to the various steps in the procedure with the following options:
- Developer Machine,
- Multifunctional database,
- Decision Support (DSS)/OLAP,
- Enable TCP/IP Networking with port number 3306,
- Enable Strict Mode,
- Standard Character Set,
- Install As Windows Service with service name “MySQL”
- Check the “Include Bin Directory in Windows PATH” check-box,
- Give a password (make sure you store this password for future reference) and then check the “Modify Security Settings: Enable root access from remote machine” check-box.
|
Warning |
|---|---|
|
By default, the character set on installation of MySQL is Latin1. To use a unicode character set, you will need to modify the my.ini file: |
default-character-set=utf8
character-set-server=utf8
When the installation is complete, it is also a good idea to install the add-on tools as it will make manipulating the database a lot easier: the MySQL Workbench is well-suited to this task. It can be downloaded from the following address: https://dev.mysql.com/downloads/workbench/.
Having downloaded the Windows MSI Installer file, double-click on the file to run the installation.
Creating the schematic and a user
Once these operations have been executed, open the MySQL Workbench. A link to the database can be specified via the SQL Development menu. You can use the button to verify your parameters:


Double-clicking on this connection opens a SQL Editor window. In the left-hand column labelled , you need to create a new schema (right-click in the window) called in this document geoweb.
Open another link also, via the Server Administration menu (to the right of the Workbench). In the Accounts tab, and then in Server Access Management tab, create a new user with a password using the button (in this document, we will take as an example a web user with the password web). Use the acronym “%” in the “Limit Connectivity to Hosts Matching” text zone.

In the menu, assign all the rights to this web user on the geoweb schema using the functionality, and then following the schema shown below:

Next, select all the rights using the button, and then .
Adding the JDBC driver
It will be necessary to download the JDBC driver from this address: https://dev.mysql.com/downloads/connector/j/ in order to authorise the Tomcat datasources to access the MySQL server.
Once the archive has been unzipped, copy-paste the driver (the .jar file only) into the <TOMCAT_HOME>\lib\ directory.
The architecture of the context file can be consulted in the Application deployment section of the documentation.
Installing the database server
The postgreSQL database can be downloaded here: https://www.postgresql.com/download/. Follow the guided installation procedure. You can also refer to the documentation on-line at this address: http://www.postgresql.org/docs/.
We recommend installing the PostgreSQL database with a pgAdmin 4 client (for Windows). Execute pgAdmin 4, and then connect to the database with administrator rights.
Creating the database
In this document, we create a web user, with “web” as password. This password will be used subsequently in the configuration of the application server.

Create a new database called “geoweb” (right-click on “Databases” in the hierarchical tree and then “Add a database”) using UTF-8 encryption and assigning it to
the “web” user in the Owner.
Use the postgres model if necessary.
Assign all the rights to this user on this geoweb database in the Rights tab.
Note that the schema named “public” is created automatically.

Adding the JDBC driver
The JDBC driver can be found at the following address: https://jdbc.postgresql.org/download.html/.
The architecture of the context file can be consulted in the Application deployment section of the documentation.
|
Tip |
|---|---|
|
From a JVM 1.6, you need to choose the JDBC4 driver. |
Unzip the downloaded file, and then copy-paste the JDBC driver (the .jar file only) into the “<TOMCAT_HOME>”/lib directory to authorise the Tomcat datasources to access the PostgreSQL server.
Authentication
If necessary, modify the configuration file pg_hba.conf that allows you to have remote access to the PostgreSQL server, using the instructions on-line: https://www.postgresql.org/docs/12/client-authentication.html.
In the framework of utilising Microsoft’s SQL Server database manager, the version shown here is SQL Server 2019 (SQLServer Express 2019 RC and SQL Server Manager Studio Express).
The version can be downloaded at: https://www.microsoft.com/en-in/sql-server/sql-server-downloads .
In the same way as described for the utilisation of MySQL, you will need to have a user (web, for example) that will be used in the framework of the application, and possess the full set of rights on the database created for the web application.
|
Tip |
|---|---|
|
(fr) A l’utilisation pour une table avec des données géographiques, il peut s’avérer nécessaire de faire les opérations suivantes :
update <table> set <colonne geom>.STSrid=0;
CREATE TABLE <TABLE_NAME>(
    [f_table_catalog] [nvarchar](50) NULL,
    [f_table_schema] [nvarchar](50) NULL,
    [f_table_name] [nvarchar](100) NULL,
    [f_geometry_column] [nvarchar](50) NULL,
    [coord_dimension] [int] NULL,
    [srid] [int] NULL,
    [type] [nvarchar](50) NULL
)
|
Installing the database
Having first downloaded and started the installer, two steps must be respected during the installation of SQL Server 2019:
- the creation of an Admin SQL Server account. In our example, the identifier is: sa and the password: manager.
- specify the name that the SQL Server instance will have in the Windows Services menu. Here, for example, the instance will be called SQLEXPRESS.
Once these elements have been configured and the installation terminated, run SQL Server Manager Studio Express by connecting as follows:

Indicate the server name: name-of-the-machine (or IP address)\name-of-the-instance. Then, choose SQL Server Authentication as the authentication mode. Finally, indicate the identifier and the password defined during the installation of the DBMS (for example: sa / manager).
Creating the database
Once connected, the next step relates to the creation of a database that will be associated to the application, this being essential for its deployment and correct functioning. In this example, the database will be called "geoweb".
Right-click on the directory, and then select .


Then, in , create a giving an access name / username, for example web, and a password web. Take care to specify that it is a SQL Server Authentification. Specify also that the default database is "geoweb", the base created earlier.


Next, create the mapping between the user and the database. Click on , then , and right-click on the user name created. Click finally on .

In the connection properties / user, click on and check the following options:
- associate the "geoweb" database to the user;
- check that the default schema indicates the dbo value;
- database role ownership, check: "db_owner" and leave "public" checked;

Configuration of SQL Server
Once the database, the user and the mappings have all been configured, it will be necessary to open SQL Server Configuration Manager (configuration tool) in order to configure the SQL Server 2019 network connections.
When the configuration tool has opened, click on , select then double-click on .

In the menu, and the protocol tab, switch the Activated parameter to Yes. Then, in the Adresses IP tab, in the IPAll dialogue at the bottom of the window, enter a value of 1433 for TCP Port and do not assign any value to the Dynamic TCP Ports parameter.

When these parameters are validated, return to the left-hand menu and click on ; a SQL Server list is displayed in the menu’s right-hand pane. Right-click on SQL Server (SQLEXPRESS) and finally click on .

Adding the JDBC connector and the XML configuration file
After configuring SQL Server 2008, you will have to store the JDBC driver in the “<TOMCAT_HOME>”/lib directory of the Tomcat application server.
The connector is accessible at the following address: https://docs.microsoft.com/en-us/sql/connect/jdbc/microsoft-jdbc-driver-for-sql-server?view=sql-server-ver15 .
|
Tip |
|---|---|
|
The version of the connector is only efficient if the Java version is compatible with (https://docs.microsoft.com/en-us/sql/connect/jdbc/system-requirements-for-the-jdbc-driver?view=sql-server-ver15). The connector transmitted is functional with versions of JVM later than version 5. |
For everything to be operational, you should combine deployment of the new .war with a new xml file specific to the joint utilisation of the Designer and SQL Server (to be placed in the “<TOMCAT_HOME>”/conf/Catalina/localhost of the Apache Tomcat application server).
The architecture of this context file can be consulted in the “Deployment of the application” section of the documentation.
|
Tip |
|---|---|
|
Take care to check that the SQL Server Browser services, and the SQL Server (SQLEXPRESS) are activated: |
It will be necessary to create a specific user to be used by the Geoconcept Web application with the appropriate rights. Here is an example script for the creation of a web user for an Oracle database:
Create a user
define username = web
define userpwd = web

drop user &username cascade;

create user &username identified by &userpwd default tablespace users;
alter user &username quota unlimited on users;
grant create session to &username;
grant create table to &username;
grant create view to &username;
grant create sequence to &username;
The database schema will be initialised by the application once the Geoconcept Web installation is terminated.
Choose the JDBC driver corresponding to your version of Oracle. It can be found at the following address: https://www.oracle.com/database/technologies/appdev/jdbc-downloads.html. The driver is of the ojdbcXX.jar type (where XX corresponds to the number of the ojdbc driver version).
The architecture of the context file can be consulted in the Application Deployment section of the documentation.
|
Tip |
|---|---|
|
When using a version of Oracle Express, the value to indicate for the schema is “XE”. |
|
Tip |
|---|---|
|
Note that the Oracle connection or login string is not identical depending on the method (SID or Service Name) used:
|
|
Tip |
|---|---|
|
A l’utilisation pour une table avec des données géographiques, il peut s’avérer nécessaire de faire les opérations suivantes :
CREATE TABLE GEOMETRY_COLUMNS(
   F_TABLE_SCHEMA VARCHAR(30) NOT NULL,
   F_TABLE_NAME VARCHAR(30) NOT NULL,
   F_GEOMETRY_COLUMN VARCHAR(30) NOT NULL,
   COORD_DIMENSION INTEGER,
   SRID INTEGER NOT NULL,
   TYPE VARCHAR(30) NOT NULL,
   UNIQUE(F_TABLE_SCHEMA, F_TABLE_NAME, F_GEOMETRY_COLUMN),
   CHECK(TYPE IN ('POINT','LINE', 'POLYGON', 'COLLECTION', 'MULTIPOINT', 'MULTILINE', 'MULTIPOLYGON', 'GEOMETRY') ));
|
Geoconcept Web Map is the mapping display and tile drawing component developed around the Geoconcept Geographic Information System. From version 6.0 upwards, this display engine is naturally multi-thread (for optimum performances) and multi-instances without any specific configuration.
It is fully integrated in Geoconcept Web and no longer requires utilisation of a specific Windows server, being managed via the Administration / Tools / Map handling page.
Universal Geocoder JEE is the Java component of the Universal Geocoder Server that is necessary when setting up a geocoding web service in Geoconcept Web, and also for the purpose of using the geocoding functionality in the portals. All other web applications having a geocoding functionality are also concerned.
In the case of a utilisation from Geoconcept Web, only the JEE component must mandatorily be installed (the .NET and Cmdline components are not necessary). It will suffice to follow the steps in the installer to install the components needed for the correct functioning of the JEE UGC.
The Geoconcept Web installer installs the universal Geocoder libraries in “<GEOCONCEPT_WEB_HOME>”/tomcat/lib, with “<GEOCONCEPT_WEB_HOME>” the filepath for installing Geoconcept Web. These .jar files are the following:
- activation.jar
- javax-ressource.jar
- jdom.jar
- log4j-1.2.16.jar
- ugc.jar
In the case of a manual installation, you will need to indicate to the application server where the JEE UGC application is
to be found. Using any standard text editor, you can edit the server.xml file present in a directory with a name similar to “<TOMCAT_HOME>”\conf\,
Within the GlobalNamingResources tag, add the following lines of code:
        <!--UGC-->
        <Resource
                name="geoconcept/ugc/default"
                type="com.geoconcept.ugc.service.CodingProvider"
                scope="Shareable"
                description="UGC connection factory -local dll"
                auth="Container"
                RootDirectory="``<UGC_HOME>''"
                RefTablesDirectory="``<DATA_HOME>''\data\maps"
                factory="com.geoconcept.ugc.connect.tomcat.ConnectionFactory"
                ConnectionMode="LocalDll"
     />
The UGC_HOME and DATA_HOME character strings should be replaced with suitable filepaths.
The user also has the option to add the filepath to a directory that stores the reference tables:
RefTablesDirectory="D:\Data\TableRef"
This application tests that UGC JEE is operating correctly. To deploy it, you will need to:
-
copy the
“<GEOCONCEPT_WEB_HOME>”\tools\admin\webapps\ugc-admin.warfile into the“<GEOCONCEPT_WEB_HOME>”\tomcat\webapps\folder -
copy the
“<GEOCONCEPT_WEB_HOME>”\tools\admin\config\ugc-admin.xmlfile into the“<GEOCONCEPT_WEB_HOME>”\tomcat\conf\Catalina\localhost\folder
Open any Internet browser and type the following address: http://ServerName:HostNumber/ugc-admin
![[Note]](images/community/docbook/note.png) |
Note |
|---|---|
|
For example, in our example: http://localhost/ugc-admin. |
In the administration tool, click on “Load datasource” and type in the name of the reference table: Loire (the example table located in the “<DATA_HOME>”\data\maps directory).
Click next on «Active datasources» and then on “test”. The default address is located in the 13th district of paris. Click on “Search”: a result should appear in the window located below the search form.
Using the ugc-admin webapp, you can specify the configuration of your reference table. This option can be very useful when your reference table is not in the same coordinates system as the Geoconcept map, for example.
This new configuration can be applied by clicking on Datasource configuration, and then clicking on . You will then have to specify the EPSG code in the Coordinate system field so that the geocoder returns the results in the correct coordinates system.

JEE SmartRouting is the Java component of SmartRouting Server, needed to set up web services for route calculation, search around..etc in the Geoconcept Web Platform, and also needed when using the route calculation functionality in the portals. All other web applications featuring a route calculation functionality are also concerned.
In the case of a configuration based on the Geoconcept Web Platform, it is essential to install the JEE component (however, note that the CmdLine component is not necessary). It will suffice to follow the installer steps to install the elements needed for the correct functioning of JEE SmartRouting.
The Geoconcept Web installer installs the JEE SmartRouting Server libraries under “GEOCONCET_WEB_HOME”\tomcat\lib, with “GEOCONCET_WEB_HOME” the installation filepath for Geoconcept Web. These .jar files are the following:
- jdom.jar
- log4j-1.2.16.jar
- smartrouting.jar
When performing a manual installation, you will need to indicate to the application server where the JEE SmartRouting application
is to be found. Using a text editor, edit the server.xml file present in a directory such as, for example, “TOMCAT_HOME”\conf\,
Add the following lines to the GlobalNamingResources tab:
        <!--SmartRouting-->
        <Resource
                name="geoconcept/smartrouting/default"
                type="com.geoconcept.smartrouting.Provider"
                scope="Shareable"
                description="Smartrouting connection factory -local dll"
                auth="Container"
                RootDirectory="``<SMARTROUTING_HOME>''\smartrouting\jee\smartrouting"
                GraphsDirectory="``<DATA_HOME>''\data\maps"
                factory="com.geoconcept.smartrouting.connect.tomcat.ConnectionFactory"
                ConnectionMode="LocalDll"
    />
The SMARTROUTING_HOME and DATA_HOME character strings should be replaced by suitable filepaths.
As an option, you can also add the filepath to a directory that stores the reference tables:
GraphsDirectory="D:\Data\graphs"
This application allows you to test that JEE SmartRouting is operating correctly. To deploy it you will need to:
-
copy the
“<GEOCONCEPT_WEB_HOME>”\tools\admin\webapps\smartrouting-admin.warfile into the“<GEOCONCEPT_WEB_HOME>”\tomcat\webapps\folder -
copy the
“<GEOCONCEPT_WEB_HOME>”\tools\admin\config\smartrouting-admin.xmlfile into the“<GEOCONCEPT_WEB_HOME>”\tomcat\conf\Catalina\localhost\folder
Open an Internet browser and type the following address: http://name_of_server:number_of_port/smartrouting-admin
|
Note |
|---|---|
|
For example, in our case: http://localhost/smartrouting-admin. |
The allows you to verify that the installation is correct. The message All tests succeeded should display.
In the administration tool, click on “Datasources configuration”. The graphs defined in the default directory (or the directory
defined by the GraphsDirectory tag in the server.xml file) then display.
By clicking on test, you can test the calculation of a route: a result should appear in the window located below the search form.
The web application deployed by the installer is geoconcept-web.
This application allows you to handle parameters for Geoconcept Web. You will beed to deploy the application in the architecture installed beforehand.
Over and above its function as black box for responding to web service queries, the web application provides an interface for defining certain parameters:
- the reference table used by the geocoding web service,
- the graph to use for calculating a route,
-
management of the cache:
- cache directory,
- deleting or invalidating the cache,
- pre-calculation of the cache for certain map view tabs,
- management of users, user rights, and user groups,
- management of saved images in the database.
The .war file is the compressed file containing the web application. It will be necessary to deploy it in the Apache Tomcat server.
You will find this war file in the “<GEOCONCEPT_WEB_HOME>”/tomcat/webapps folder, with “<GEOCONCEPT_WEB_HOME>” the Geoconcept Web installation filepath.
Stop Apache Tomcat services.
Place the geoconcept-web.war file in the “<TOMCAT_HOME>”/webapps directory.
The presence of the context file, named geoconcept-web.xml, is mandatory, and it must be located in the “<TOMCAT_HOME>”\conf\Catalina\localhost directory. This file allows the user to specify various parameters, including the password and name of the database necessary to the correct functioning of the mapping application.
This file can be created from an empty text document by modifying its extension. Examples are available at “<GEOCONCEPT_WEB_HOME>”\database\conf\Catalina\localhost.
|
Warning |
|---|---|
|
The name of the .war file and that of the .xml file must be identical. |
It will be necessary to edit the geoconcept-web.xml file as a function of which DBMS is used. Copy-Paste in this file the following parameters depending on which DBMS you are using, and modify:
- the user (web in our example),
- the password associated to the user (web in our example),
- the database schema for the application (SCHEMA_BASE in our example),
- the installation filepath for the solution (“<GEOCONCEPT_WEB_HOME>” in our example).
|
Warning |
|---|---|
|
Special case scenarios:
|
<Context reloadable="false">
<Resource
name="jdbc/geoweb"
auth="Container"
type="javax.sql.DataSource"
username="web"
password="web"
driverClassName="com.mysql.jdbc.Driver"
url="jdbc:mysql://localhost:3306/SCHEMA_BASE?useUnicode=true&characterEncoding=UTF-8"
maxActive="8"
maxIdle="4"
testWhileIdle="true"
validationQuery="SELECT 1"
testOnBorrow="true"
timeBetweenEvictionRunsMillis="1800000"
minEvictableIdleTimeMillis="21600000"
/>
<!-- geocoder resource definition -->
<ResourceLink
global="geoconcept/ugc/default"
name="geoconcept/ugc/default"
type="com.geoconcept.ugc.service.CodingProvider"
/>
<!-- smartrouting resource definition -->
<ResourceLink
global="geoconcept/smartrouting/default"
name="geoconcept/smartrouting/default"
type="com.geoconcept.smartrouting.Provider"
/>
<!-- geoconcept web map resource definition -->
<ResourceLink
global="geoconcept/gc/default"
name="geoconcept/gc/default"
type="com.geoconcept.gc.provider.Provider"
/>
<Environment name="LicenseFilePath" value="C:\Program Files\GEOCONCEPT\Geoconcept Web\license" type="java.lang.String" override="true"/>
</Context>
When using PostgreSQL database
<Context path="geoweb" >
<Resource
name="jdbc/geoweb"
type="javax.sql.DataSource"
username="web"
password="web"
driverClassName="org.postgresql.Driver"
maxWait="5000"
url="jdbc:postgresql://localhost:5432/SCHEMA_BASE?useUnicode=true&characterEncoding=UTF-8"
maxActive="8"
maxIdle="4"
/>
<!-- geocoder resource definition -->
<ResourceLink
global="geoconcept/ugc/default"
name="geoconcept/ugc/default"
type="com.geoconcept.ugc.service.CodingProvider"
/>
<!-- smartrouting resource definition -->
<ResourceLink
global="geoconcept/smartrouting/default"
name="geoconcept/smartrouting/default"
type="com.geoconcept.smartrouting.Provider"
/>
<!-- geoconcept web map resource definition -->
<ResourceLink
global="geoconcept/gc/default"
name="geoconcept/gc/default"
type="com.geoconcept.gc.provider.Provider"
/>
<Environment name="LicenseFilePath" value="C:\Program Files\GEOCONCEPT\Geoconcept Web\license" type="java.lang.String" override="true"/>
</Context>
When using a SQL Server database
<Context reloadable="false">
<Resource
        name="jdbc/geoweb"
        auth="Container"
        type="javax.sql.DataSource"
        username="web"
        password="web"
        driverClassName="com.microsoft.sqlserver.jdbc.SQLServerDriver"
        url="jdbc:sqlserver://localhost:1433;databaseName=SCHEMA_BASE;"
        maxActive="8"
        maxIdle="4"
/>

<!-- geocoder resource definition -->
<ResourceLink
  global="geoconcept/ugc/default"
  name="geoconcept/ugc/default"
  type="com.geoconcept.ugc.service.CodingProvider"
/>

<!-- smartrouting resource definition -->
<ResourceLink
  global="geoconcept/smartrouting/default"
  name="geoconcept/smartrouting/default"
  type="com.geoconcept.smartrouting.Provider"
/>

<!-- geoconcept web map resource definition -->
<ResourceLink
  global="geoconcept/gc/default"
  name="geoconcept/gc/default"
  type="com.geoconcept.gc.provider.Provider"
/>

<Environment name="LicenseFilePath" value="C:\Program Files\GEOCONCEPT\Geoconcept Web\license" type="java.lang.String" override="true"/>

</Context>
<Context reloadable="true">

 <Resource name="jdbc/geoweb" auth="Container"
        type="javax.sql.DataSource"
        username="web"
        password="web"
        driverClassName="oracle.jdbc.OracleDriver"
        url="jdbc:oracle:thin:@localhost:1521:SCHEMA_BASE"
        maxActive="8"
        maxIdle="4"
        testWhileIdle="true"
        timeBetweenEvictionRunsMillis="1800000"
        minEvictableIdleTimeMillis="21600000"/>

<!-- geocoder resource definition -->
<ResourceLink
  global="geoconcept/ugc/default"
  name="geoconcept/ugc/default"
  type="com.geoconcept.ugc.service.CodingProvider"
/>

<!-- smartrouting resource definition -->
<ResourceLink
  global="geoconcept/smartrouting/default"
  name="geoconcept/smartrouting/default"
  type="com.geoconcept.smartrouting.Provider"
/>

<!-- geoconcept web map resource definition -->
<ResourceLink
  global="geoconcept/gc/default"
  name="geoconcept/gc/default"
  type="com.geoconcept.gc.provider.Provider"
/>

<Environment name="LicenseFilePath" value="C:\Program Files\GEOCONCEPT\Geoconcept Web\license" type="java.lang.String" override="true"/>

</Context>
|
Tip |
|---|---|
|
When using a version of Oracle Express, the value to indicate for SCHEMA_BASE is “XE”. |
When using an HSQLDB database
HSQLDB is a database written in Java. It is an embedded database: it creates files directly on the disk: no previous installation is therefore necessary.
In the context of utilisation of Geoconcept Web, parameters may be stored with the help of a database solution embedded via HSQLDB technology. To obtain the JDBC driver, go to the following site: http://www.hsqldb.org/. This driver takes the form hsqldb.jar. It should be placed in the “<TOMCAT_HOME”>\lib directory.
When using this database, it will be necessary to create the DesignerParameters.xml file in the “<TOMCAT_HOME>”\lib directory
and to complete the parameters as described below, with parameters specific to the configuration of your server.
In the example below, the DB files will be created directly in the C:\DB directory.
This parameter can be modified via the url line.
<Context path="/geoconcept-web" reloadable="true" >
<!-- Extra info begin -->
<Parameter name="database.connection.datasource"
value="java:comp/env/jdbc/geoweb" override="true"/>

<Resource
        name="jdbc/geoweb"
        auth="Container"
        driverClassName="org.hsqldb.jdbcDriver"
        maxActive="100"
        maxIdle="30"
        maxWait="10000"
        password="web"
        username="web"
        type="javax.sql.DataSource"
        url="jdbc:hsqldb:file:[Path\To\Database]"
/>

<!-- geocoder resource definition -->
<ResourceLink
  global="geoconcept/ugc/default"
  name="geoconcept/ugc/default"
  type="com.geoconcept.ugc.service.CodingProvider"
/>

<!-- smartrouting resource definition -->
<ResourceLink
  global="geoconcept/smartrouting/default"
  name="geoconcept/smartrouting/default"
  type="com.geoconcept.smartrouting.Provider"
/>

<!-- geoconcept web map resource definition -->
<ResourceLink
  global="geoconcept/gc/default"
  name="geoconcept/gc/default"
  type="com.geoconcept.gc.provider.Provider"
/>

<!-- Extra info end

<Logger className="org.apache.catalina.logger.SystemOutLogger" verbosity="4" timestamp="true"/>

<Environment name="LicenseFilePath" value="``<GEOCONCEPT_WEB_HOME>''\license" type="java.lang.String" override="true"/>

</Context>
|
Tip |
|---|---|
|
Summary:
|
Once the .war and .xml files have been stored in their respective disk locations (cf. preceding paragraphs), run the Apache Tomcat services.
It will then be necessary to specify certain parameters in order to be sure the cartographic application and associated services operate correctly.
There are two ways to apply any adjustments necessary:
- modify the database directly on condition that access is possible on the server or remotely,
- modify the parameters via the administration console. The changes will be automatically saved in the database.
We will select the second solution. The first is reserved for advanced users who know how the application operates, and how to set the various parameters required for the smooth operation of the application.
Modifying parameters via the administration console
The console is accessible via the URL: http://localhost/geoconcept-web from the server. This URL must be adapted to your own installation (localhost replaced by the name of your machine, a port number if applicable, geoconcept-web replaced by the filename of your .war file if you have modified the geoconcept-web name).
By default, the connection parameters are the following: admin / geoconcept. Connect to the application.

By default, the user sees the home page display.
|
Tip |
|---|---|
|
To recap: For the correct deployment, you will need to fulfill the following 5 conditions:
If any one of these conditions is not respected, deployment will fail. |
