A visit consists of any scheduled meeting between the mobile resource in the field and a customer. In TourSolver, the visit will have a different status as it evolves over time. The status makes it possible for both resource and application to distinguish one visit from another in terms of its progress status (planned, fulfilled, etc) and handle the way the visit behaves accordingly.
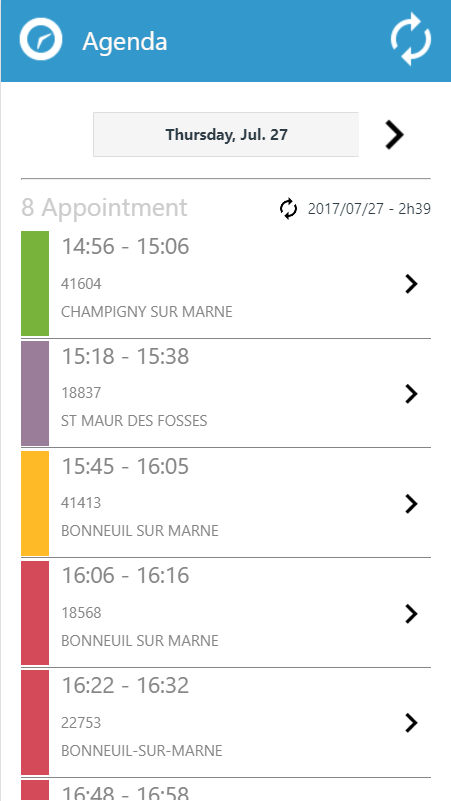
The list of agenda items that is consultable for each day displayed in the application, presents for each one:
-
for unavailabilities:
- the start and finish time (or the start and finish date/time if this is a multi-day event);
- the type (rest time, lunch break etc).
-
for visits:
- the start and finish time (or the start and finish date/time if this is a multi-day event);
- the description of the visit;
- the town.
The Agenda module handles the user’s visits. The user taps on each visit to access it, and enters details about progress for the current day’s visits as these are confirmed, fulfilled, cancelled, etc…

![[Tip]](images/community/docbook/tip.png) |
Tip |
|---|---|
|
The colour of the left-hand bar on each element indicates its type (unavailability or visit) and the status of each visit. Each colour corresponds to a specific status:
|
![[Note]](images/community/docbook/note.png) |
Note |
|---|---|
|
At any time, you can return to the list of elements by tapping the |

Information about a visit
Tapping on a visit in the agenda, a page opens to display different items of information about the visit.
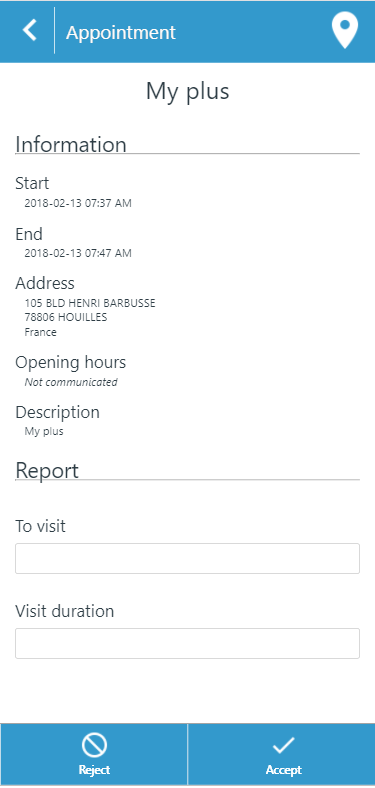
In the majority of instances, the information displayed are:
- the start and finish time of the visit;
- the address of the visit;
- the opening hours of the customer;
- the description of the visit;
To this can be added a visit report: the visit report fields must be created beforehand and configured via the TourSolver platform, in the Configure the mobile app menu.
Information about an unavailability
Tapping on an unavailability, the user opens a page that displays the various information items concerning the unavailability:
- the start date/time;
- the end date/time;
- description of the unavailability.
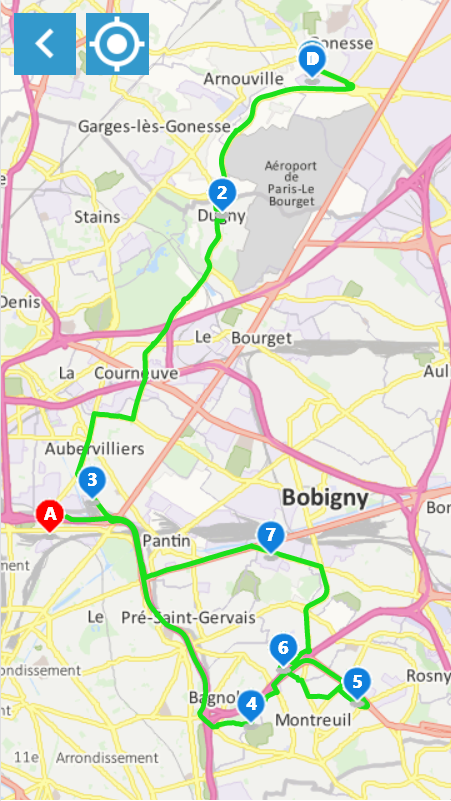
The  icon is shown in the form when the agenda item is localised. When you tap on it, this icon accesses the localisation for
the visit on a map and its tour.
icon is shown in the form when the agenda item is localised. When you tap on it, this icon accesses the localisation for
the visit on a map and its tour.
|
Note |
|---|---|
|
The choice of the mapping service can be defined in the mobile app settings. (Cf. section on Settings) |
Geoconcept mapping service
When the Geoconcept mapping service is used, different functions are suggested in the upper part of the map:
- return to the previous page describing the agenda item;
- positioning in the map on the current geolocation (available only if the corresponding parameter has been enabled from the server, in the Configure the mobile app menu).
Google mapping service
If the Google mapping service is configured, the Google Maps application is then called (clearly it has to have been installed
beforehand on the device being used) and the series of functionalities associated to Google Maps are then available.
- different types of cartography;
- geolocalisation;
- information about road traffic conditions;
- guided navigation to the list observed in the map;
- …
Waze Mapping Service
If the Waze mapping service is configured, the Waze application is then called (for this to happen, it must have been installed
previously on the device used) and the series of Waze functionalities are then available:
- itinerary search;
- localisation on a map;
- information about road traffic conditions;
- guided navigation to the list observed in the map;
- …
When consulted in the agenda, a visit will suggest several possible actions linked to its life cycle, that might modify the visit status:
-
Before accepting the visit:
- Reject: visit status changes to unplanned/requested (available only if the corresponding parameter has been enabled from the server, in the Configure the mobile app menu);
- Accept: visit status changes to confirmed/handled;
-
Before fulfilment of the visit:
- Abandon: visit status changes to abandoned (available only if the corresponding parameter has been enabled from the server, in the Configure the mobile app menu);
- Begin: visit status changes to confirmed/in progress;
-
During its fulfillment:
- Cancel: visit status changes to planned/confirmed;
- Done: visit status changes to fulfilled/accomplished status.
Tapping on the button, the user indicates that the visit is starting. The visit status changes to Started.

The visit’s real start time then appears in the Report section.

Before terminating the visit and/or having finished the visit, certain information items can be entered in the various editable zones. A signature and some photos can also be taken (this option is only available if the corresponding parameters have been activated from the server, in the Configure the mobile app menu). These information items are then sent, via the TourSolver platform, to the Planning Manager who can take action in response to messages uploaded from the field.
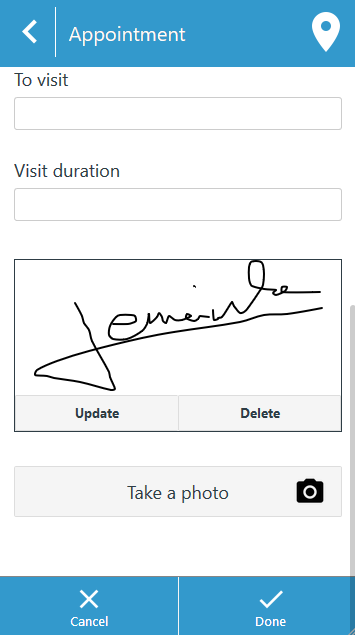
Tapping on the button, the visit status will change to Fulfilled/Completed, and the button sends the data to the TourSolver solution.


|
Note |
|---|---|
|
As the mobile application communicates with the TourSolver solution, any information filled in at the application interface level will be automatically put on-line on the platform so that scheduling staff can follow-up the progress on visits. |
Within the agenda, the colour of the band associated to the visit changes as a function of its status and shows that the visit is finished.

The user can also cancel a visit that has already started if circumstances dictate, by tapping on the button.

Tapping on the button returns the user to the visits page, without applying any modifications made. The visit assumes a status of Planned/Confirmed.
The user can specify that a visit has not taken place by tapping on the button (available only if the corresponding parameter has been enabled from the server, in the Configure the mobile app menu).

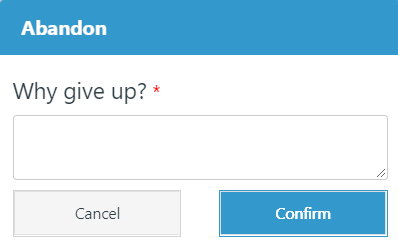
Having first tapped on the button, an interactive window prompts for the reason(s) the visit has not taken place, and then prompts the user to either or the action. Filling in the reason for abandoning the visit enables the scheduling team to take appropriate action (Plan a new visit, for example).
The status of the visit will change in the main menu window. It now appears with the appropriate colour to indicate its new status.
|
Note |
|---|---|
|
When abandonment of a visit is confirmed, the application sends the data to the TourSolver platform. As in the case of a finished visit, the status of the visit is updated on the platform. It disappears therefore from the current day’s visits. |

